|
|
UVa Physics Computer Facilities
|
Using the UVa Anywhere VPN Under Linux
- Prerequisites:
- For CentOS you'll need to have the following packages installed:
- openconnect
- NetworkManager-openconnect
- NetworkManager-gnome
NetworkManager will need to be able to control the network interface through which you'll be running the VPN. If you have a static IP address configured through /etc/sysconfig/network-scripts/ifcfg-eth*, the technique described below won't work. You'll be able to create the VPN, but it will be grayed out.
- For Ubuntu you'll need to have the following packages installed:
- openconnect
- network-manager-openconnect
- network-manager-openconnect-gnome
- Get a Personal Certificate:
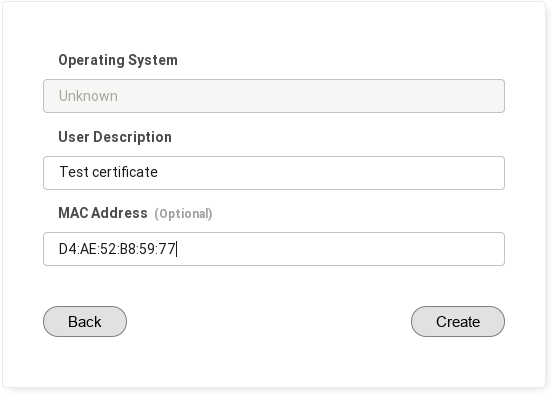
Point a web browser at https://cloud.securew2.com/public/82116/limited/?device=Unknown and follow the instructions there.

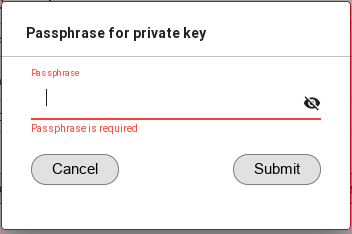
Note that you'll be asked to choose a passphrase for the certificate. The passphrase must be shorter than 15 characters. If you attempt to enter a longer passphrase, you'll see a "passphrase invalid" message.

At the end, this process should download a file with a name ending in ".p12".
- Configure the VPN:
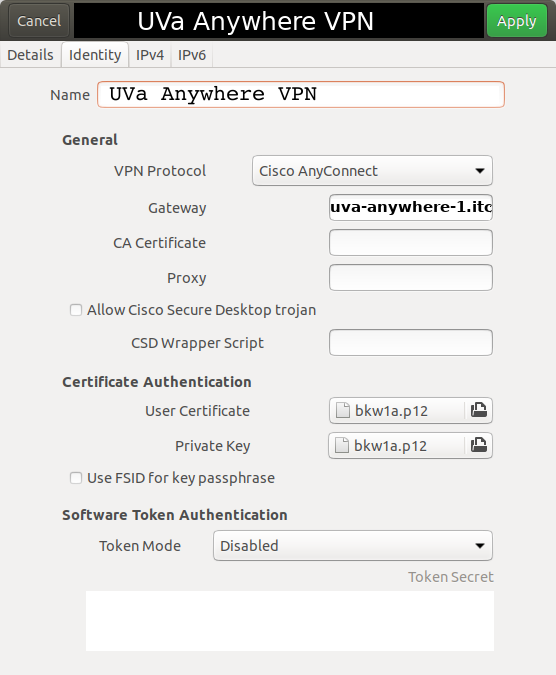
Click the network icon (nm-applet) on your task bar.For the UVa Anywhere VPN, configure it as shown here (note the caveats below the image):

- The name of the gateway should be uva-anywhere-1.itc.virginia.edu
(Note that this configuration can also be used on-grounds for the "More Secure" VPN by substituting moresecure-vpn-1.itc.virginia.edu for the gateway name.)
- Both the "User Certificate" and "Private Key" should be pointed to the "p12" file you downloaded earlier.
Note: A bug in NetworkManager might cause your certificate file not to appear in the list of available files.
In this case, you can work around the problem by opening a file manager and dragging-and-dropping the file onto the
appropriate box in the form.
- Make sure you go to the "General" tab and UNcheck the box labeled "Available to all users" (failing to do this might prevent the VPN from working).
Save your changes.
- Connect to the VPN:
When you connect to the VPN you'll be asked for a password. This is the passphrase you used when creating the p12 certificate, above.
In addition, starting in March 2021, if you are connecting to the More Secure Network VPN you will also be presented with a second "password" box for two-factor authentication with Duo. Don't type your password into this new "password" box. Instead, type either the word "push" or a Duo passcode number. If you enter "push", a Duo push request will pop up on your cell phone for you to approve.
If you need to use a passcode number instead of a push notification, there are several ways to get one:
- If you have the Duo app on your smartphone, open the app and click on the rotunda icon. This will give you a passcode number that you can type into the new VPN password box.
- If you have a Duo Token (a small hardware device for Duo logins) you can use this to generate a passcode for you.
- You can also generate passcodes using the "Identity and Access Management" web site: https://identity.virginia.edu/identity/self-service/uva/autologin.jsf?tab=196 . Click the "Generate Random Codes" button at the bottom of the screen.
Note that, unfortunately, only push notifications and numeric passcodes will work for the new VPN/Duo authentication. Duo authentication by phone call is not allowed here.
|
|

